
An introduction to the development of browser extensions for Google Chrome.
Browser extensions are now widely known. However, most users only install an ad blocker and then turn their backs on the Chrome Web Store. Yet extensions can be extremely useful for both businesses and private individuals, as they are by no means limited to blocking ads.
The essentials at a glance:
To give you a better understanding of how to create an extension, we’ll walk you through building a simple browser extension that suggests your currently assigned tasks via the URL bar.
Configure the Extension
To create a browser extension, we need a manifest.json file that contains the configuration for our extension. For simplicity, I’ve created it in its own folder.
The manifest file uses the JSON format. Only properties that are defined in the documentation may be used. So that you don’t have to dig through the entire documentation, I’m providing the manifest file for our extension.
{
“name”: “Jira++”,
“description”: “Retrieve Jira tickets via the Omnibox.”,
“version”: “1.0”,
“icons”: {
“16”: “jira_16.png”,
“48”: “jira_48.png”,
“128”: “jira_128.png”
},
“manifest_version”: 2,
“background”: {
“persistent”: false,
“scripts”: [ “background.js” ]
},
“options_ui”: {
“chrome_style”: true,
“page”: “options/options.html”
},
“permissions”: [ “storage” ],
“omnibox”: { “keyword”: “jira” }
}
Most of the properties are self-explanatory. First, we define “cosmetic” properties such as name (name), description (description), version (version), and the icons to be used (icons).
The background object defines a JavaScript file that runs in the background. This means that the script has no direct access to the content of a website and cannot manipulate it.
With the options_ui object, we define an options page for the extension. In this context, chrome_style means that the options page will not open in a new window.
Finally, there are the permissions and omnibox properties. The former allows us to register permissions for the extension. For our extension, we only need storage, so that we can save data on the user’s computer.
Since, as mentioned earlier, we want to make suggestions in the address bar (the “omnibox”), we also need to define a keyword. In my case, this is jira.
Creating the Missing Files
Before we can install the extension, we still need to create the missing files. In our case, these are the icons (jira_16.png, etc.), background.js, and options.html. The latter file should be placed in a subfolder named options.
Your folder structure should look roughly like this after creating the files:
Extension
│ │ background.js
│ │ jira_128.png
│ │ jira_16.png
│ │ jira_48.png
│ │ manifest.json
│ │
│ └───options
│ options.html
Installing the Extension
After you have created the manifest file, you can already install the extension for testing. Here’s how:
Navigate to chrome://extensions in the address bar.
Enable Developer mode at the top right.
Click the Load unpacked button on the left.
Select your folder containing the extension files in the dialog.
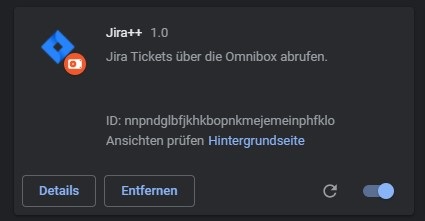
If the extension was successfully installed, you should see a tile similar to the image below (the icon will of course look different).
Note
In developer mode, you can reload the extension by clicking the circular arrow if you’ve made any changes.
Show Options Page After Installation
So far, we have only done configurations. In this step, we start programming. Open the created file background.js in an editor of your choice (e.g., Notepad++).
In the manifest file, we already defined an options page. Since some settings configured there have an essential impact on how the extension is used, it’s helpful to open this options page immediately after installation so the end user can enter their data right away and won’t overlook or forget it.
To execute something upon installation, you need to define an event listener for the onInstalled event:
chrome.runtime.onInstalled.addListener(details => {
if(details.reason === “install”) {
chrome.runtime.openOptionsPage();
}
});
The event listener’s name is a bit misleading — it catches not only the extension’s installation event but also other installation and update events. That’s why we use the optional parameter details. This object contains the actual reason for the event — in our case, we check if the reason is install, meaning the extension was just installed. If so, we open the options page using the chrome.runtime API.
Testing Installation
To test the installation, you need to uninstall the extension (click the “Remove” button) and then go through the installation steps again under “Installing the Extension.” This is necessary because clicking the reload arrow triggers an update event instead of install.
Showing Suggestions
Now, let’s get to the main content of the extension. Open the background.js file again. Here, we add an onInputChanged event listener for the Omnibox:
This listener executes whenever a character is entered in the address bar after the keyword (in my case, jira).
To make suggestions, we use the second parameter suggest, which is a function we can call. The variable input contains the text typed after the keyword.
For this extension, the typed text is irrelevant, so we won’t use it further.
At AMCON, we use Atlassian solutions internally, including Jira, which is used to create and manage tickets (“tasks”). Jira provides an API to query these tickets (including filtering by person).
Note
If you don’t use Jira, you can of course use other endpoints or fallback to local storage in the extension where, for example, tasks are stored.
To load my tickets, you can use the following code— replace the URL with your own:
Insert this code where the comment //Insert additional code here is.
First, we create a constant array to temporarily store suggestions. Then we load the username from the extension’s storage (the username can be defined on the options page). If the username exists, we fetch all tickets of that user as JSON. Then we iterate over each ticket and add a suggestion object with properties content and description. The description is what the end user sees.
Finally, we call the suggest function to display the loaded suggestions.
Retrieving Suggestions
Suggestions are now displayed, but nothing happens yet when you click one or press Enter. For that, we need an onInputEntered event listener that catches these interactions. Add the following code below the previously defined onInputChanged event listener:
This code opens a new tab and loads the specified URL. The input variable contains the current text in the address bar. If you choose a suggestion, the content of that suggestion is used for input.
If you type jira web-1000 in the address bar and press Enter, the page will open. Choosing a suggestion will use the suggestion’s content instead of your typed input.
Creating the Options Page
The options page is a normal website, except that when you save, data is stored in the extension’s storage. To keep this guide concise, the necessary files for the options page are attached. Simply place them in the options directory. You can overwrite options.html.
Download:
- media/files/options.html
- media/files/options.js
- media/files/style.css
Conclusion
Creating extensions can offer many possibilities, as demonstrated by this example. You can start using the extension by installing it via developer mode. There are, of course, other ways to install extensions if needed. If you want to know more, feel free to contact me at lars.koelker@amcon.de.